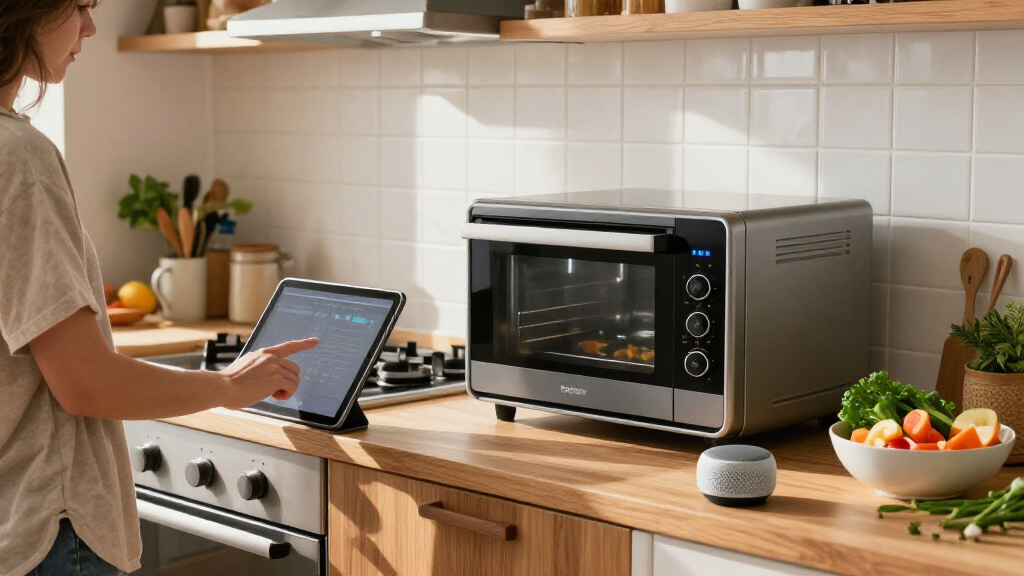
Set up smart home devices in your kitchen to control lighting, monitor leaks, manage compatible appliances, or use voice commands. This guide is for beginners planning a small setup or adding devices to an existing smart home. Allow 1-2 hours, depending on how many devices you install and whether your Wi-Fi needs adjustment.

Get kitchen staples and gadgets delivered free with Prime
- Fast, free delivery on millions of items
- Prime Video, Amazon Music and more included
- Member-only deals all year

Echo Show 15 – 15.6" Full HD Smart Display with Built-in Fire TV
- ✔ Display: 15.6-inch Full HD (1920 × 1080), landscape or portrait
- ✔ Dimensions: 16.1 × 10.1 × 1.4 inches
- ✔ Weight: 4.96 lb

Echo Spot Smart Alarm Clock with Alexa, Black
- ✔ Display: 2.83-inch touchscreen, 240 × 320 pixels
- ✔ Dimensions: 4.5 × 4.1 × 4.4 inches
- ✔ Weight: 14.3 oz (405 g)
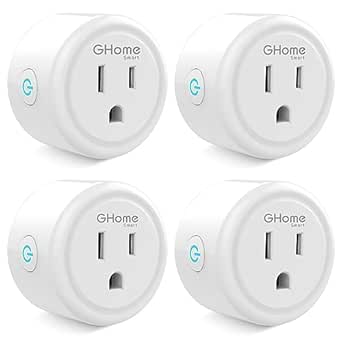
GHome Smart Plug Mini – Wi-Fi Outlet Works with Alexa & Google Home, Timer, App Control, 2.4 GHz Only, No Hub Required (4 Pack),…
- ✔ Pack quantity: 4 plugs
- ✔ Electrical rating: 120 V, up to 10 A / 1200 W
- ✔ Dimensions: 2 × 2 × 1 inches
Difficulty: Beginner | Time: 1-2 hours
What You’ll Need
Tools & Materials:
- Smartphone or tablet with the manufacturer’s app
- Kitchen Wi-Fi access and network password
- Compatible smart devices, such as a smart plug, bulb, leak sensor, or appliance
- A ladder or step stool for safely reaching light fixtures, if needed
Knowledge:
- Basic smartphone and app use
- Ability to identify your Wi-Fi network and password
- Ability to read device labels and appliance power ratings
Check each device’s requirements before buying. Some devices only work on 2.4 GHz Wi-Fi, require a hub, or support specific voice assistants. Do not use a smart plug with an appliance unless the plug is rated for that appliance’s load and intended use. Never use a smart plug to remotely start a stove, oven, toaster, or other heating appliance.
Echo Show 15 – 15.6" Full HD Smart Display with Built-in Fire TV
The Echo Show 15 is the strongest choice when the kitchen is a shared information hub, not just a place to issue quick voice commands. Its 15.6-inch Full HD screen can show customizable widgets and stream Fire TV, giving it a more useful role during meal prep than the Echo Spot’s small clock display. The wide screen also makes video calls easier to follow from across a room, and its camera includes a physical shutter for privacy.Its smart home support is unusually broad for this lineup: Zigbee, Matter, and Thread are built in, alongside Alexa and Sidewalk. That can reduce the need for separate hub hardware when connecting compatible devices. The GHome plugs are simpler if all we need is scheduled on-and-off control, and the Spot takes up less space. The Show 15’s tradeoff is physical presence: at nearly five pounds, it needs a suitable surface or careful wall mounting, and its size may be excessive for a small kitchen. It makes most sense when the display and hub features will both be used.
Pros:
- Large 15.6-inch Full HD display supports dashboards and video viewing.
- Built-in Fire TV provides streaming without a separate device.
- Zigbee, Matter, and Thread support expands smart home compatibility.
- 13 MP camera offers auto-framing and a physical shutter.
Cons:
- Nearly five pounds, so wall mounting requires a secure, suitable location.
- Large footprint may be more screen than a compact kitchen needs.
- Bluetooth hands-free voice control is not supported for Mac OS X devices.
Best for: Households wanting a shared kitchen dashboard for family updates, video calls, streaming, and compatible smart home devices.
Not ideal for: Anyone with limited wall or counter space, or who only needs a compact clock or basic appliance scheduling.
Bottom line: Choose the Echo Show 15 when a visible family dashboard and capable smart home hub justify its size and mounting needs.
“Choose the Echo Show 15 when a visible family dashboard and capable smart home hub justify its size and mounting needs.”
Echo Spot Smart Alarm Clock with Alexa, Black
When counter space is at a premium, the Echo Spot gives us a useful glance at the time, weather, and song information without turning the kitchen into a screen-first space. Its 2.83-inch touchscreen is much smaller than the Show 15, so it is better for quick checks than recipes, family dashboards, or watching video. With Alexa voice control and a full-range speaker, it can still handle short requests and music while we cook.The Spot’s compact dimensions make placement easier than mounting the heavier Show 15, and it provides a camera-free option for buyers who do not want video calling in the kitchen. It can also extend eero mesh Wi-Fi when paired with a compatible eero router, a perk the other two picks do not offer. That benefit is conditional, however, and it does not replace the Show 15’s broader built-in hub support. Compared with the GHome plugs, the Spot is a visible control point with audio, but it does not automate appliance schedules by itself.
Pros:
- Compact form fits where the Show 15 would dominate the counter.
- Shows time, weather, and song information at a glance.
- Full-range speaker supports kitchen listening and Alexa responses.
- Made with 36% recycled materials and includes privacy controls.
Cons:
- Small 2.83-inch display is not suited to viewing recipes or video.
- No camera for video calls or facial recognition.
- Wi-Fi extension requires a compatible eero router.
Best for: Buyers who want an Alexa-enabled clock, glanceable information, and music in a small kitchen or breakfast nook.
Not ideal for: People who need a large screen for recipes or video, want video calls, or lack a compatible eero router for Wi-Fi extension.
Bottom line: Pick the Echo Spot for a compact Alexa clock and speaker when a large display would be unnecessary.
“Pick the Echo Spot for a compact Alexa clock and speaker when a large display would be unnecessary.”
GHome Smart Plug Mini – Wi-Fi Outlet Works with Alexa & Google Home, Timer, App Control, 2.4 GHz Only, No Hub Required (4 Pack),…
The GHome Smart Plug Mini takes a different approach from the Echo devices: it adds schedules, timers, and voice control to compatible plugged-in appliances rather than giving us a screen or speaker. The four-pack makes it possible to automate several outlets, and group control can keep routines together. For a kitchen, that may be useful for devices we want to switch on or off on a schedule, provided the appliance is appropriate for plug-based control and stays within the stated rating.Setup is more involved than simply adding an Echo Spot to a counter: each plug must first be configured in the GHome app before linking it to Alexa or Google Home. It also works only on 2.4 GHz Wi-Fi, unlike the Spot’s dual-band connection or the Show 15’s Wi-Fi 6E support. The plugs are the most focused and expandable option here, but they do not provide the broad device integration of the Show 15’s hub or the quick visual feedback of either Echo display. Check appliance requirements carefully; this plug is rated for up to 10 A and 1200 W at 120 V.
Pros:
- Four plugs support scheduling and grouped control across outlets.
- Works with Alexa and Google Home without a separate hub.
- Compact body is designed to fit tight outlet spaces.
- ETL and FCC certified; rated up to 10 A and 1200 W.
Cons:
- Supports 2.4 GHz Wi-Fi only.
- Requires setup in the GHome app before linking voice assistants.
- Does not provide a screen, speaker, camera, or built-in smart home hub.
Best for: People who want to schedule multiple compatible appliances and already have reliable 2.4 GHz Wi-Fi.
Not ideal for: Buyers who want a kitchen display, a standalone voice device, or need 5 GHz Wi-Fi or higher electrical capacity.
Bottom line: Choose the GHome four-pack when appliance schedules matter more than a dedicated kitchen display or voice device.
“Choose the GHome four-pack when appliance schedules matter more than a dedicated kitchen display or voice device.”
As an Amazon Associate we earn from qualifying purchases.
Before You Start
Choose one or two useful tasks first, such as adding a leak alert under the sink or controlling a lamp. Confirm that the router reaches the intended device location. Keep devices away from sinks, cooking surfaces, steam, and hot areas unless their labels specifically permit that environment. Turn off power at the breaker before replacing a hardwired fixture, and hire a qualified electrician if you are unsure how to do the work.
Step-by-Step Instructions
Step 1: Choose the kitchen tasks to automate
Write down the jobs you want a device to handle. For example, use a leak sensor to alert you to water under the sink, a smart bulb for hands-free lighting, or a compatible appliance app for status notifications. Match each job to a device type before shopping.
Check the device’s location limits, power needs, hub requirements, and compatibility with your phone or smart home platform. For any plug-in device, compare its rated load with the appliance label. If either rating is unclear, do not connect them.
Tip: A smart plug usually controls power only. It may not operate an appliance’s buttons or safely restart it after a power interruption.
Check: You have a short list of devices, their intended locations, and the features you expect each to provide.
Step 2: Prepare the network and device locations
Use your phone to check that Wi-Fi works where each device will sit. Note the network name and password, and confirm whether a device needs a 2.4 GHz network or a separate hub. Place hubs in an open spot with a stable connection, away from metal cabinets and large appliances that can block signals.
Pick locations that stay dry and cool within the device’s stated limits. For a leak sensor, choose a flat spot near a likely leak point, such as beneath the sink, without placing it where routine cleaning will trigger it.
Tip: If the router signal is weak, move the device closer during setup. Relocate it to its final position after pairing and test the connection there.
Check: Your phone has a reliable connection at setup locations, and each device has a suitable final placement.
Step 3: Install the manufacturer’s app and create an account
Download the official app named in the device instructions. Create an account if required, then review the app’s permissions and grant only those needed for setup and alerts. If you use a voice assistant, confirm that the device supports it before linking accounts.
Open the app and add the device using its setup code or the in-app pairing instructions. Keep the device’s label or QR code accessible until setup is complete.
Tip: Use a unique account password and enable account security options offered by the manufacturer. Avoid sharing a device login when household sharing controls are available.
Check: The app opens, your account is active, and you can reach the add-device screen.
Step 4: Install and pair each device
Follow the device’s instructions for plugging it in, fitting a bulb, placing a sensor, or connecting an appliance to its app. For a hardwired light fixture, switch off the circuit at the breaker and verify power is off before touching wiring. Stop and contact an electrician if the wiring does not match the instructions.
Put the device in pairing mode as directed, then select it in the app. Enter the Wi-Fi details or scan the setup code when prompted. Give the device a clear name, such as “Under-sink leak sensor” or “Kitchen ceiling light.”
Tip: Pair one device at a time and keep your phone close. This makes it easier to identify which device is being added if setup fails.
Check: The app lists each device as connected, and its name makes its location or purpose easy to recognize.
Step 5: Set controls, alerts, and household access
Open each device’s settings and choose practical controls. Set leak alerts to reach the people who can respond, and check whether alerts can arrive when the app is closed. For lights, choose schedules or dimming levels that suit the kitchen’s use and avoid unwanted switching while someone is cooking.
If another household member needs access, use the app’s sharing feature and give them their own account access. Link a voice assistant only if you want voice control, and choose names that are easy to say and distinct from other room devices.
Tip: Keep voice control away from high-risk actions. Do not create routines that can energize a cooking appliance unattended.
Check: Controls and alerts match your intended use, and authorized household members can access the devices they need.
Step 6: Test devices in their final positions
Use the app to turn each controllable device on and off. Test any dimming, schedule, or status feature you plan to use. For a leak sensor, follow the manufacturer’s test method; dry the sensor fully afterward and confirm that the alert reaches the intended phone.
Check the Wi-Fi or hub connection after moving devices to their final locations. Observe any plug or adapter for warmth, unusual sounds, or a loose fit during normal use. Disconnect it if you notice these signs, and check the device and appliance ratings.
Tip: Do not test a leak sensor by flooding the area. Use its test button or the method specified in its manual.
Check: App commands work from the normal kitchen position, alerts arrive as expected, and devices remain connected in place.
Step 7: Record setup details and review safety
Save the device manuals, model numbers, and support links where household members can find them. Note which circuit controls any hardwired device and where leak sensors are placed. Review each device’s update and notification settings from time to time.
Keep smart devices clear of splashes, grease, steam, and heat unless they are rated for those conditions. Unplug a device before cleaning it, and follow its instructions for cleaning or battery replacement.
Tip: A smart device is not a substitute for a smoke alarm, a person watching cooking, or a proper shutoff valve.
Check: You can locate device instructions, identify each device’s purpose, and describe how to test or disconnect it.
Common Mistakes to Avoid
- Buying a device that does not work with the home network or smart home platform. — Check Wi-Fi band, hub needs, app requirements, and assistant compatibility before purchase.
- Connecting a high-power or heating appliance to a smart plug without checking its rating. — Compare the appliance and plug labels, follow both manuals, and do not use remote-start control for cooking or heating equipment.
- Placing a sensor where splashes, cleaning, or steam trigger false alerts or damage it. — Follow the device’s location limits and test it in its intended position.
- Assuming a device is safe because it appears in the app. — Test controls and alerts, inspect placement, and follow the manufacturer’s power and environmental limits.
Troubleshooting
Problem: The device does not appear during pairing.
Solution: Confirm it has power, reset or re-enter pairing mode using the manual, bring your phone closer, and verify the required Wi-Fi band. Retry after checking the app’s device-specific instructions.
Problem: Pairing fails after the Wi-Fi password is entered.
Solution: Check the password and network name, confirm the router’s security and band meet device requirements, and temporarily move the device nearer the router. Avoid guest networks if the device manual says they are unsupported.
Problem: The device works nearby but drops offline in its final location.
Solution: Check signal strength at that spot, reposition the hub or router if possible, and keep the device away from metal enclosures. Consider a compatible access point or mesh node if coverage remains weak.
Problem: A sensor alert does not arrive on the phone.
Solution: Check the app’s notification permissions, the sensor battery, and its connection status. Run the manufacturer’s test again and confirm the correct household members are selected for alerts.
What Success Looks Like
The setup is complete when every device appears under a clear name in its app, responds to its intended controls from its final location, and sends required alerts to the right people. Devices must be placed within their stated environmental limits, and any plug-in appliance combination must meet the ratings and instructions for both products.
Next Steps
Check device status and alert delivery after the first week of use, then repeat sensor tests and battery checks on the schedule in each manual. Review household access when people move in or out. Add more devices only when a specific kitchen task would benefit, and remove any device that disconnects repeatedly or cannot be used within its safety limits.
Frequently Asked Questions
Do kitchen smart devices need a separate hub?
Some connect directly to Wi-Fi, while others need a hub or bridge. Check the product requirements and confirm whether the hub is included before purchasing.
Can I use a smart plug with a coffee maker?
Only if the smart plug is rated for the coffee maker and the appliance manufacturer permits that method of control. Many plugs only cut or restore power; they do not operate the coffee maker’s controls. Do not use remote control if it could start heating unattended.
Will kitchen devices work if the internet goes down?
It depends on the device. Some local controls may keep working, while remote access, voice services, or notifications may stop. Check the manual for offline behavior and test local controls.
Where should I place a leak sensor?
Place it on a stable surface near a likely leak source, such as under a sink or beside a dishwasher, following its environmental limits. Keep it accessible for testing and avoid locations where routine water use will trigger it.
How often should I test kitchen sensors?
Follow the manufacturer’s schedule. Test after installation, after moving a sensor, and after replacing its battery. Confirm that the alert reaches the people who need to act on it.